
Introduction
In the world of web development, security is a top priority. Developers working with ASP.NET Core 6 have access to a robust framework for securing their applications. One essential tool in the developer’s toolbox is the Authorization filter. In this blog post, we’ll explore the purpose and benefits of the Authorization Filter in .NET Core 6, how to implement it, and various examples to illustrate its usage.
What is the Authorize Filter?
The Authorize filter is a built-in feature in .NET Core that enables developers to restrict access to certain parts of their application based on the user’s identity or role. It provides fine-grained control over which users can access specific controllers, actions, or resources within your application.
Why Use the Authorize Filter?
- Security: Restrict access to authorized users only.
- Flexibility: Easily apply authorization policies across different controllers or actions.
- Customization: Create custom authorization logic tailored to your application.
Setting Up Authorization in .NET Core 6
To use the Authorize filter, you need to configure authorization in your application:
- Add authentication services: Add authentication services to your
Startup.csfile.
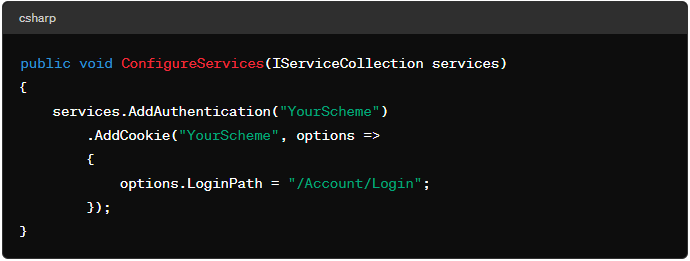
Add authorization services: Add authorization services after authentication.
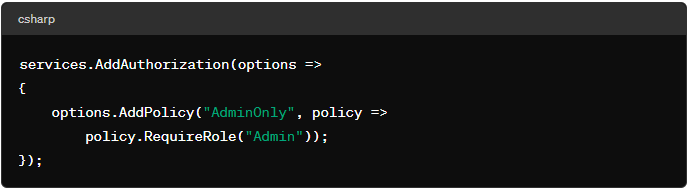
Configure policies: Define your authorization policies, such as requiring specific roles or claims.
Applying the Authorize Filter
The Authorize filter can be applied in various ways:
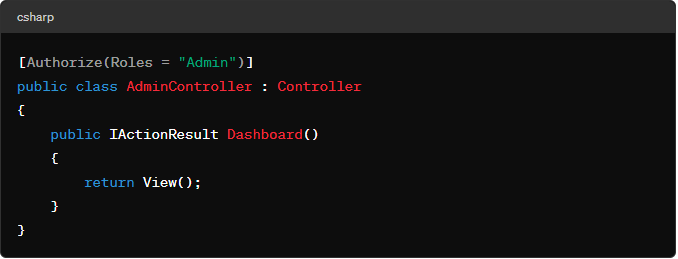
- Controller Level: Apply the Authorize filter to an entire controller to restrict access to all its actions.
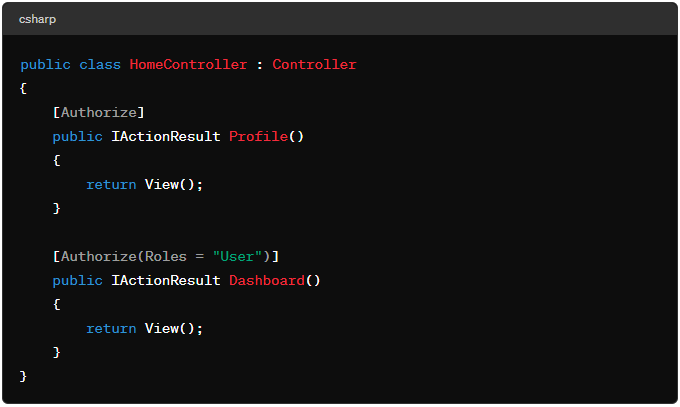
Action Level: Apply the Authorize filter to specific actions within a controller.
Policy-based Authorization: Define and apply custom authorization policies.
Custom Authorization in .NET Core 6
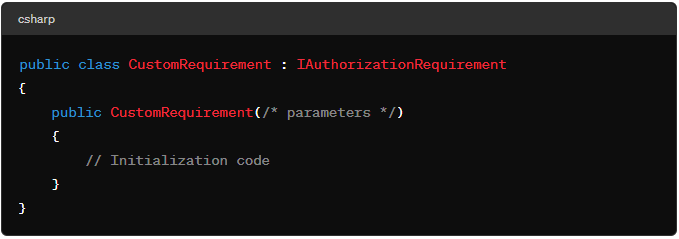
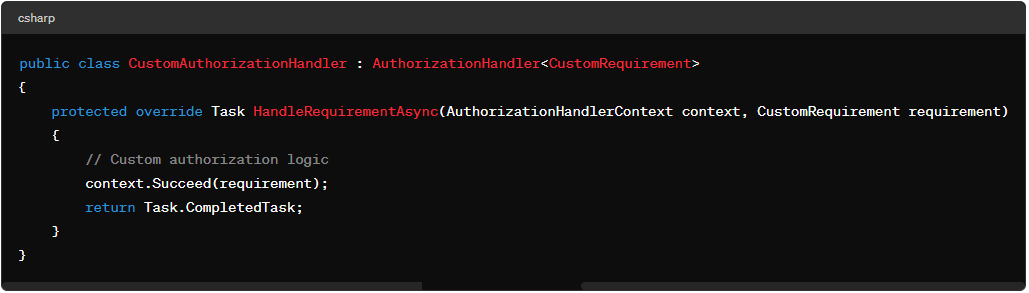
You can create custom authorization requirements and handlers to tailor the authorization process to your application’s specific needs:
- Define a custom requirement: Create a class that implements
IAuthorizationRequirement.
Create a custom authorization handler: Implement the AuthorizationHandler class.
Register the custom handler: Add the custom handler to your services.

Common Use Cases and Examples
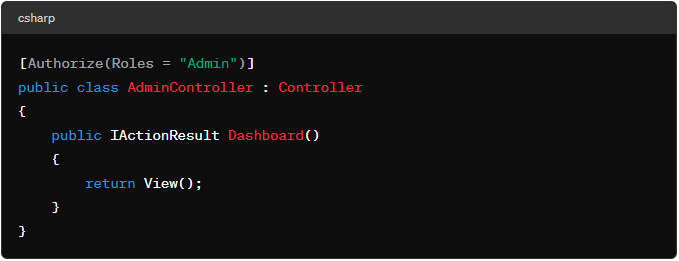
Use Case 1: Role-based Access Control
- Scenario: Restrict access to an admin dashboard to users with the “Admin” role.
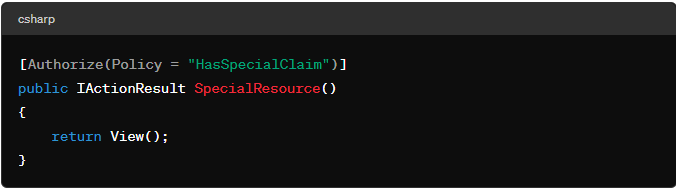
Use Case 2: Claim-based Authorization
Scenario: Allow access to a resource only if the user has a specific claim.
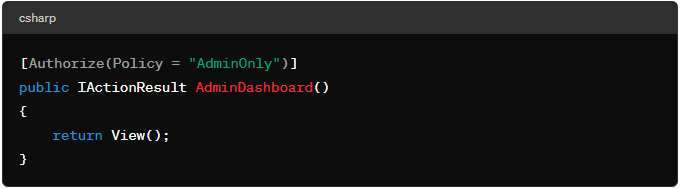
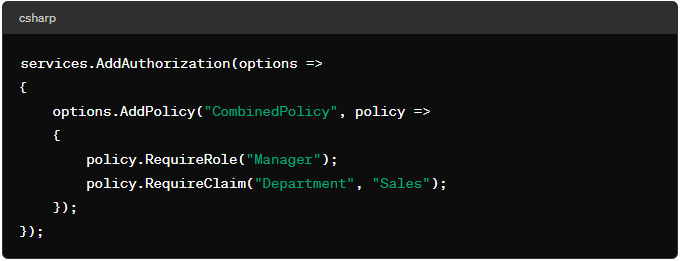
Use Case 3: Policy-based Authorization
- Scenario: Define a policy that combines multiple requirements.
Best Practices for Using the Authorize Filter
- Granular Authorization: Apply authorization at the action level whenever possible for precise control.
- Use Policies: Create custom policies for complex authorization scenarios.
- Test Thoroughly: Ensure your authorization logic works as expected for different user roles and claims.
Conclusion
The Authorize filter in .NET Core 6 is a powerful tool for securing your application and ensuring that only authorized users have access to certain resources. By following the examples and best practices outlined in this guide, you can implement robust authorization in your .NET Core applications.